
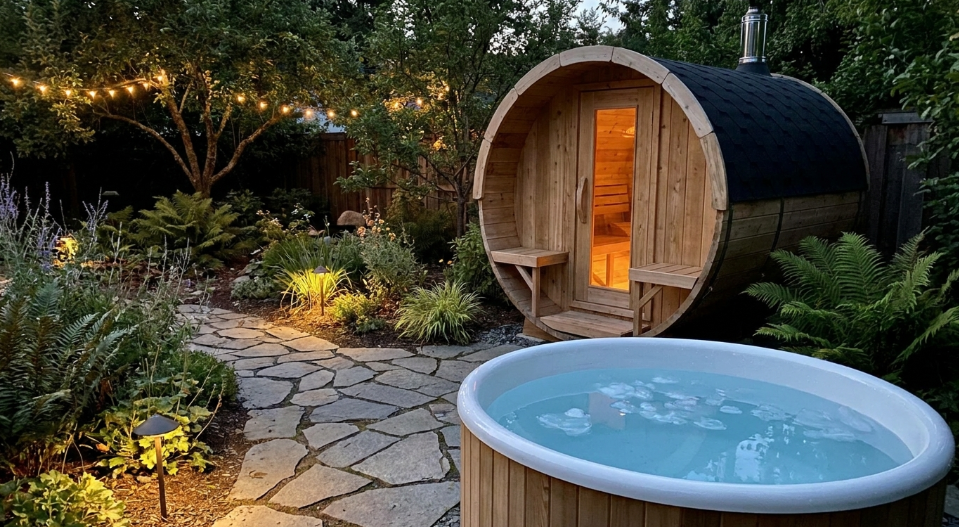
Three decisions shape whether an outdoor sauna install goes smoothly: the voltage of the circuit feeding it, the type of base it sits on, and the clearances around the heater. Each has a cheaper, faster option and a sturdier, longer-lasting one, and the right call depends on the heater size, the yard, and how long you plan to own the thing. Below is how the common choices actually compare, not just a list of code minimums.
120-volt outlet or a dedicated 240-volt circuit?
A handful of small infrared cabins are built to run on a household 120-volt outlet, which sounds appealing because it skips the electrician entirely. In practice, most traditional outdoor heaters draw enough wattage, generally above 6 kilowatts, that they require a dedicated 240-volt circuit sized to the specific amperage on the heater’s data plate. The 120-volt option heats more slowly and struggles in cold or windy conditions outdoors, so it tends to suit smaller, milder-climate setups rather than a full-size backyard cabin meant to hold 170 degrees on a January evening. If the heater spec sheet lists anything close to double-digit kilowatts, plan on the 240-volt circuit from the start rather than discovering the limitation after delivery.
Gravel and paver base or a poured concrete slab?
Gravel with a paver or timber frame on top is the faster, cheaper route: a weekend project in most yards, typically a few hundred dollars in material, and it drains well because water simply passes through it. A poured concrete slab costs more, often several times as much once forms and a contractor are involved, and needs days to cure before the sauna can be set on it. What concrete buys you is a perfectly flat, permanent surface that will not shift or settle the way a gravel base occasionally does after a hard freeze-thaw winter. For a lighter barrel sauna on stable soil, gravel is usually the more practical call. For a heavy multi-room cabin or a site with soft or sloped ground, the extra cost of concrete often pays for itself in fewer callbacks for a releveled door.
Wood-fired heater or electric, and how the clearances differ
Wood-fired stoves run hotter at the body of the unit and typically demand more distance from combustible walls, along with a noncombustible hearth pad underneath and in front to catch sparks and stray embers. Electric heaters follow a tighter, published clearance figure tied to kilowatt rating, usually measured in single-digit inches from the nearest wall, with a defined empty zone in front where nothing should ever be stored. Wood-fired setups also need a chimney or flue routed and flashed correctly through the roof, an extra step electric installs skip entirely. If the appeal of wood heat is the ritual of tending a fire, that is a legitimate reason to choose it, but budget for the additional clearance space and flue work rather than assuming it slots into the same footprint as an electric unit.
Indoor-style ventilation habits do not translate outdoors
People installing their first outdoor unit sometimes carry over ventilation habits from an indoor sauna, like worrying about a closed room building up humidity. Outdoors, airflow around the cabin is rarely the issue; wind exposure and heat loss are. A sauna sited in a wind tunnel between two structures will run its heater harder and longer to hold temperature than the same unit tucked against a fence line or a row of shrubs that cuts prevailing wind. Positioning the door away from the prevailing wind direction, where practical, is a small siting choice that measurably affects both comfort and the electric bill.
DIY circuit or a licensed electrician for the yard run?
Running conduit across a yard, especially buried conduit crossing a lawn or under a walkway, is not the place to save money with a DIY circuit. Outdoor runs need weatherproof materials, correct burial depth, and GFCI protection at the disconnect, and an improperly buried or connected line is both a safety risk and a common reason inspections fail. A licensed electrician who has priced backyard sauna runs before will also know local code specifics, such as whether a disconnect must be within sight of the unit, that a generic online guide will not cover for your municipality. Several manufacturers, including the team at SweatDecks, publish spec sheets with the exact amperage and clearance numbers for each heater model, which is worth having in hand before that first call to an electrician.
What tends to go wrong when people mix and match shortcuts
The install problems that show up months later are almost always a shortcut in one of these three areas. An undersized circuit run on an extension cord workaround trips breakers and can damage the heater’s element over time. A gravel base skipped in favor of setting the cabin straight on dirt lets moisture wick into the floor boards within a season. Ignored clearance minimums around a wood stove are both a fire hazard and, in many areas, grounds for an insurance claim denial after the fact. None of the three fixes is expensive when planned up front; all three get considerably more expensive once the sauna is already sitting in place.
Metal roof and flashing details or a simpler membrane roof?
Cabin roofs generally arrive in one of two styles: a shingled or metal-clad roof built to shed water like a small house, or a simpler rubber membrane roof that relies on a continuous waterproof layer rather than overlapping courses. Metal and shingle roofs tend to handle heavy snow load and long-term UV exposure a bit better, particularly in climates with real winters, but they add cost and a bit more complexity to the install if flashing needs to tie into an existing structure nearby. A membrane roof is faster to install and cheaper up front, and it performs fine in milder climates, but it typically needs recoating or patching sooner than a metal roof exposed to the same conditions. Neither choice is wrong; it is mostly a question of climate and how long you expect to own the unit before the roof needs attention again.
Should the disconnect switch sit inside or outside the cabin?
Code in most areas wants a visible, accessible disconnect near the sauna so power can be cut quickly in an emergency without hunting through a breaker panel across the yard. Mounting it just outside the cabin door, rather than inside next to the heater, keeps it reachable even if someone inside is dealing with a heater fault or a stuck door. It also keeps the switch itself away from the highest heat and humidity in the cabin, which extends its working life. This is a small detail an electrician will usually get right without being asked, but it is worth confirming during the planning conversation rather than assuming it by default.
Frequently Asked Questions
Should an outdoor sauna run on 120 volts or 240 volts? Small infrared cabins under about 2 kilowatts can often use a 120-volt outlet, but heaters above 6 kilowatts, which covers most traditional units, need a dedicated 240-volt circuit.
Is a concrete pad better than a gravel base? Concrete is more permanent and level but costs more and needs curing time. Gravel is faster, cheaper, and drains well, and suits lighter units on stable ground.
Do wood-fired heaters need more clearance than electric ones? Generally yes, plus a noncombustible hearth pad and a properly flashed flue, while electric heaters follow tighter, kilowatt-based clearance specs.
Can a homeowner run their own outdoor sauna circuit? In most areas, no. Buried outdoor conduit and GFCI protection require a licensed electrician and typically a permit.
References
- Effects of heat and cold on health, with special reference to Finnish sauna bathing, American Journal of Physiology, 2018
- Benefits and risks of sauna bathing, The American Journal of Medicine, 2001
- Cardiovascular and Other Health Benefits of Sauna Bathing: A Review of the Evidence, Mayo Clinic Proceedings, 2018
